Hi Guys,
In the same continuation from where I left last time …
This is the Part 3 of the final part of this three post series on Oracle Real Application Testing or RAT. This part mainly deals with the replay side or the target end where you finally replays of triggers the captured workload.
Alright, so let’s get started!
I am starting immediately after step 6 (which we covered in Part 2).
Step 7:
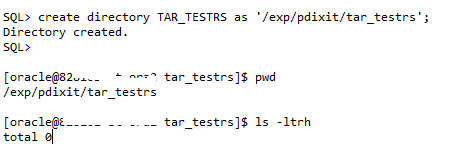
Next move all files from capture directory to target system (12c POC VM box in this case). I have created the directory for REPLAY purposes there at the target to receive all these files and to play them later on.


Next transfer the files from source.

Match the count on target directory, should be same.

RAT Replay (General) Steps:
Step 1:
The first step in preparation is to process the CAPTURE in the replay directory.
Note: This will be a one-time activity and only do if you are doing it for the first time. If the load is already processed and you have replayed it earlier then there is not any use to follow this step.
BEGIN
DBMS_WORKLOAD_REPLAY.PROCESS_CAPTURE(capture_dir=>'RAT_TRIALRUN');
END;
/
Step 2:
RESTORE DB: At This point we need to restore the database prior to the point when the Capture was started Note: No need to perform this step if this was already performed using Import or GRPs.
Step 3:
Next is to put the DB in readiness state. We have to initialize the replay.
execute DBMS_WORKLOAD_REPLAY.INITIALIZE_REPLAY('REPLAY_TRIALRUN1', 'RAT_TRIALRUN');
Step 4:
Next we will PREPARE the replay. There are many arguments that you can pass with the ‘synchronization’ parameter & many other parameters to tailor made your replay. We have finalized and opted PREPARE_REPLAY step i.e. synchronization specially.
execute DBMS_WORKLOAD_REPLAY.PREPARE_REPLAY(synchronization => 'SCN');
Step 5:
Next to get the required numbers of workload clients to run and replay that load on target database.
For that we have to run wrc utility in calibrate mode.
wrc system/xxxx mode=calibrate replaydir=/nfs_exp/prodrattest/ratdir_02092019
Step 6:
Next is to fire the recommended numbers of wrc (workload) clients on the target database to replay the captured workload.
For example, if 8 is the recommended number of replay clients. Then we can
Ex:
nohup wrc system/oracle@ mode=replay replaydir=/home/replay/rat &

On RAC Node 1:
wrc system/XXXX mode=replay replaydir=/nfs_exp/prodrattest/ratdir_02092019
wrc system/XXXX mode=replay replaydir=/nfs_exp/prodrattest/ratdir_02092019
wrc system/XXXX mode=replay replaydir=/nfs_exp/prodrattest/ratdir_02092019
wrc system/XXXX mode=replay replaydir=/nfs_exp/prodrattest/ratdir_02092019

On RAC Node 2:
wrc system/XXXX mode=replay replaydir=/nfs_exp/prodrattest/ratdir_02092019
wrc system/XXXX mode=replay replaydir=/nfs_exp/prodrattest/ratdir_02092019
wrc system/XXXX mode=replay replaydir=/nfs_exp/prodrattest/ratdir_02092019
wrc system/XXXX mode=replay replaydir=/nfs_exp/prodrattest/ratdir_02092019
Step 7:
Next when all above steps are completed, next we will be replaying the workload.
execute DBMS_WORKLOAD_REPLAY.START_REPLAY();
Step 8:
Monitoring the Replay
There are many ways to perform the monitoring of the replay process, I will be sharing few scripts and discuss few of the methods that can be used to check/verify the replay progress.
Way 1:
Monitor the progress of replay using one of the dynamic view named DBA_WORKLOAD_REPLAYS
alter session set nls_date_format = 'DD-MON-YYYY HH24:MI:SS';
SELECT ID, NAME,DBNAME,
PARALLEL,STATUS, to_char(START_TIME,'dd/mm/yyyy hh24:mi'),
to_char(END_TIME,'dd/mm/yyyy hh24:mi'),DURATION_SECS/60, NUM_CLIENTS, USER_CALLS, DBTIME, RAC_MODE
AWR_BEGIN_SNAP,AWR_END_SNAP,AWR_EXPORTED
FROM DBA_WORKLOAD_REPLAYS;
where id=2;
Way 2:
To check what’s all is happening in the database including the load pushed by WRC clients.
This is a join of gv$sqlarea, gv$session to get session and SQL details.
select x.inst_id,x.sid ,x.serial#,x.username,sqlarea.parsing_schema_name,x.sql_id
 ,sqlarea.plan_hash_value
 ,sqlarea.LAST_ACTIVE_TIME
 ,sqlarea.DISK_READS
 ,sqlarea.BUFFER_GETS
 ,sqlarea.ROWS_PROCESSED
 ,sqlarea.CPU_TIME
 ,sqlarea.LAST_LOAD_TIME
 ,x.event,x.osuser,x.status
 ,x.process,x.machine,x.program,x.module,x.action
 ,TO_CHAR(x.LOGON_TIME, 'MM-DD-YYYY HH24:MI:SS') logontime
 ,x.LAST_CALL_ET
 ,x.SECONDS_IN_WAIT,x.state,sql_text,
 ltrim(to_char(floor(x.LAST_CALL_ET/3600), '09')) || ':'
  || ltrim(to_char(floor(mod(x.LAST_CALL_ET, 3600)/60), '09')) || ':'
  || ltrim(to_char(mod(x.LAST_CALL_ET, 60), '09'))    RUNNING_SINCE
 from   gv$sqlarea sqlarea,gv$session x
 where  x.sql_hash_value = sqlarea.hash_value
 and    x.sql_address    = sqlarea.address
 and    sql_text not like '%select x.inst_id,x.sid ,x.serial# ,x.username ,x.sql_id ,x.event%'
 and    sql_text not like '%select x.inst_id,x.sid ,x.serial#,x.username,sqlarea.parsing_schema_name,x.sql_id ,sqlarea.plan_hash_value%'
 and    x.status='ACTIVE'
 and x.USERNAME is not null
 and x.SQL_ADDRESS    = sqlarea.ADDRESS
 and x.SQL_HASH_VALUE = sqlarea.HASH_VALUE
 order by RUNNING_SINCE desc;
Way 3:
Below is the method or a way to identify the replay progress in terms of percentage completed.
Code and text is pasted below.
replay_progress_percentage
Step 9:
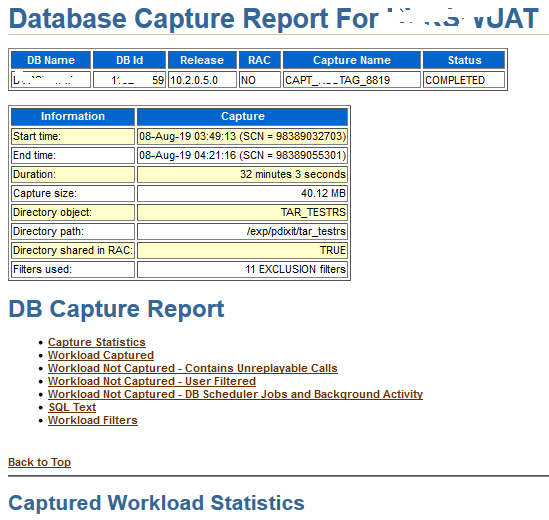
Reporting
Next step is to generate some RAT specific reporting which will be helpful to replay performance and other statistics.
DECLARE
cap_id         NUMBER;
rep_id         NUMBER;
rep_rpt        CLOB;
rpt_len                 NUMBER;
BEGIN
rep_rpt :=DBMS_WORKLOAD_REPLAY.REPORT(replay_id => 1,format => DBMS_WORKLOAD_REPLAY.TYPE_HTML);
dbms_output.put_line(DBMS_LOB.SUBSTR(rep_rpt,32767,1));
END;
/
Below is the code to generate Capture Vs Replay reports.
var report_bind clob;
begin
DBMS_WORKLOAD_REPLAY.COMPARE_PERIOD_REPORT (replay_id1 => 1, replay_id2=> null, format => 'HTML', result => :report_bind);
end;
/
Hope It Helps
Prashant Dixit